In my last post, I wrote abut the challenges of processing RAW files in ACDSee Photo Studio. The software has a great raw developer. The colour grading tools, in particular, are powerful and easy to use. But unlike many RAW developers, ACDSee Photo Studio doesn’t apply a default “look” to the RAW files as it imports them. In many ways this is a strength, leaving you free to decide exactly how you want the image to look. But it is also, on occasion, a weakness, increasing the amount of work you have to do to get a useable JPG from the RAW data.
To get round this challenge, I’ve started creating my own develop presets for my own most frequently-used cameras, starting with the Olympus OM-D E-M10 Mark II.
The Olympus OM-D E-M10 Mark II is a 16 megapixel camera, launched in 2015. This preset is designed specifically for that particular model, but should work well for any Olympus camera with a 16 megapixel sensor. In this post, I will:
- Take you through the preset step by step, explaining why I have chosen those particular values and giving you all the information you need to replicate the preset
- Explain the limitations of the preset, and what you will still need to do even after using the preset
- Provide four example images, allowing you to directly compare the original Olympus JPG with a version processed using the ACDSee preset
- Provide a downloadable copy of the preset
- Give clear instructions for importing the preset to your version of ACDSee Photo Studio.
Sounds a lot, right? No worries, we’ll go through it step by step.
IMPORTANT NOTES
- RAW developing is only available in ACDSee Photo Studio Professional and Ultimate. ACDSee Photo Studio Home does not have a develop module, and can not be used for processing RAW photos.
- These instructions apply to ACDSee Photo Studio Professional and ACDSee Photo Studio Ultimate. They have not been tested in ACDSee Photo Studio for Mac.
What settings does the preset use?
General Tab
- Exposure + 20
- Highlights -26
- These settings slightly increase the exposure, and then pull back the highlights to avoid clipping
- Vibrance +10
- Subtly increases saturation without affecting skin tones
- Clarity +4
- Improves local contrast
- Light EQ adjustment
- Pulls back slightly on the very brightest parts of the image, reducing glare for very bright scenes
- Tone Curve
- A gentle S Bend to gently add contrast
Detail Tab
- Adds some subtle sharpening and noise reduction
Geometry Tab
- Not used – see the explanation below
Lens corrections, and other things you will still need to do manually
ACDSee Photo Studio isn’t always very good at identifying the lens used for lens corrections.
Quite often, the lens identified in the View mode won’t be picked up by ACDSee in Develop mode. It’s a frustrating limitation which means that automated lens corrections in ACDSee Photo Studio can be a bit hit and miss. A much more reliable approach is to manually identify the lens in View mode (using the EXIF panel) and then manually select the correct lens for your image.
Important: remember to also select Vignette Correction in the Geometry tab.
Always remember that the settings used here are just a starting point.
- Some lenses are sharper than others, so you may need to adjust the sharpness settings to suit your images
- Photos taken at high ISOs or in low light, will contain more image noise, so you’ll need to increase noise reduction when this applies.
- And remember to have fun. Presets aren’t “one size fits all” so tweak the settings as much as you want.
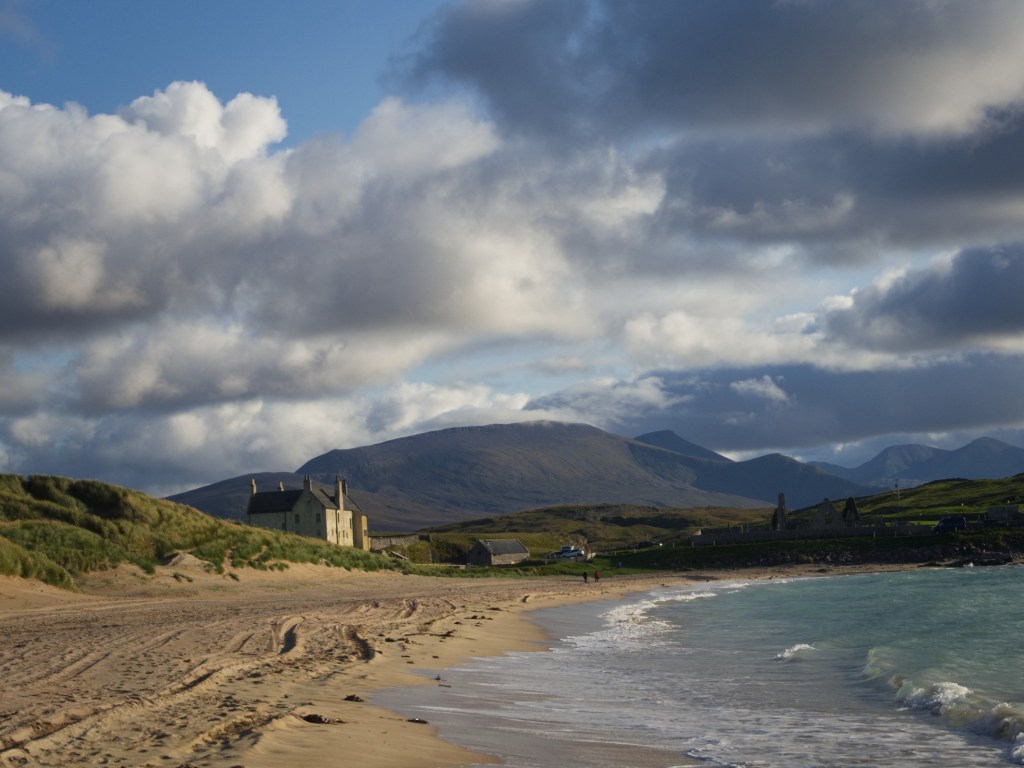
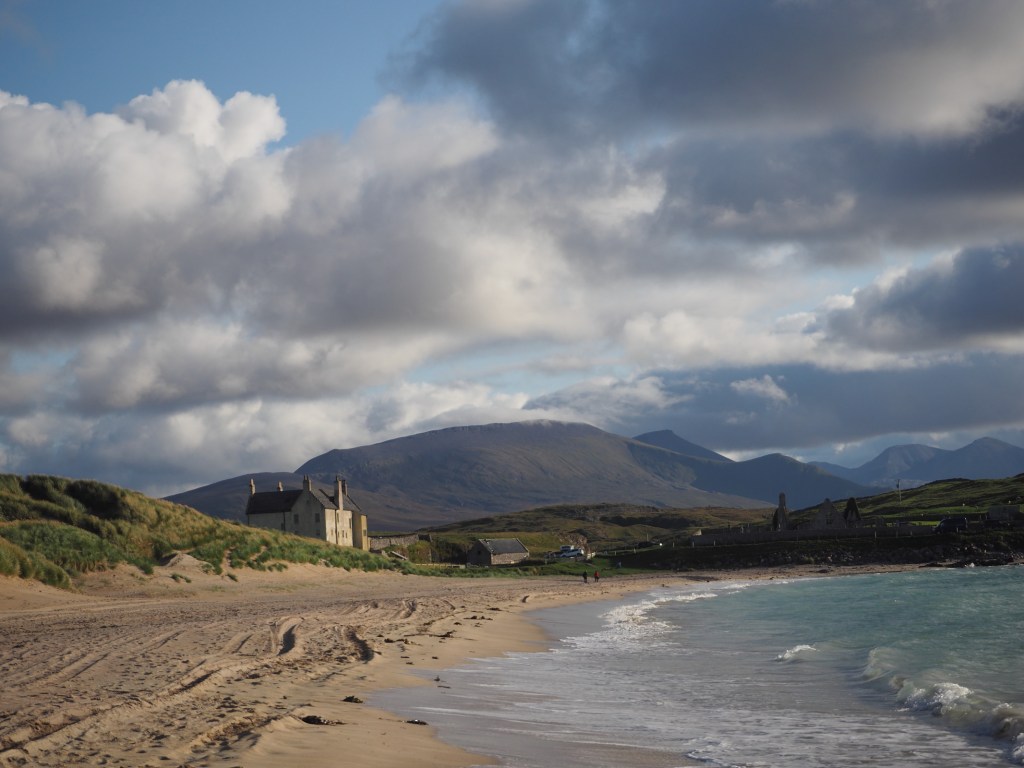
Example images
The ACDSee preset (left) is a little punchier, but the overall look of both versions is very similar.
The two images here are very similar. The ACDSee version (left) includes slightly more of the scene, due to differing lens corrections being applied.
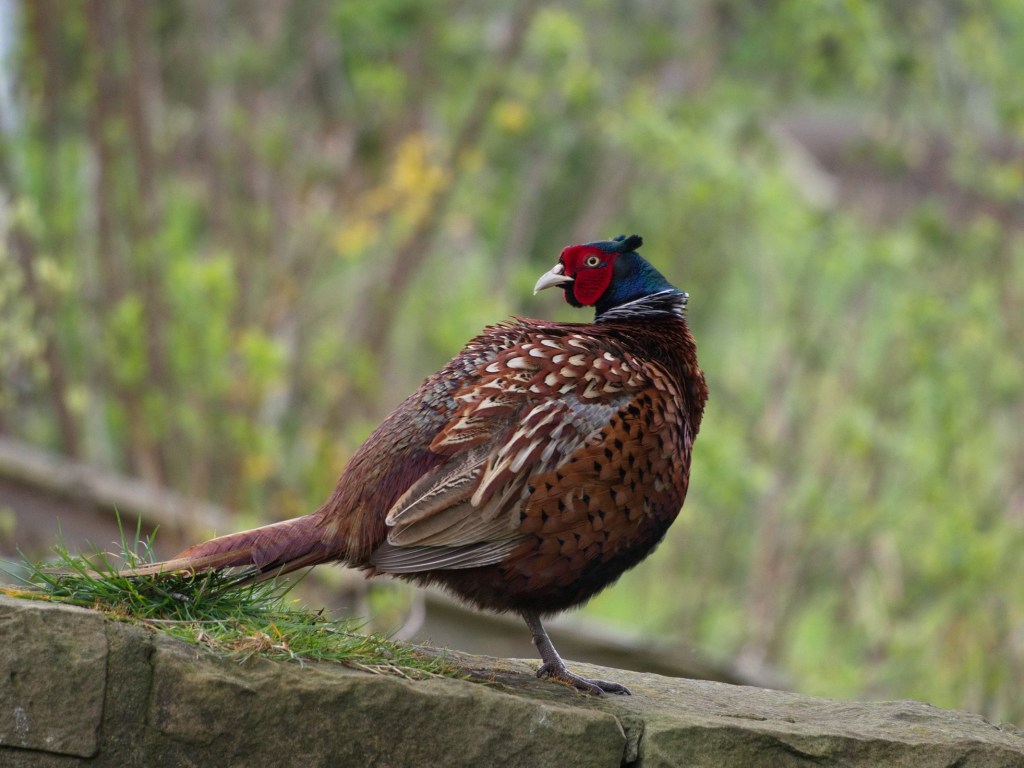
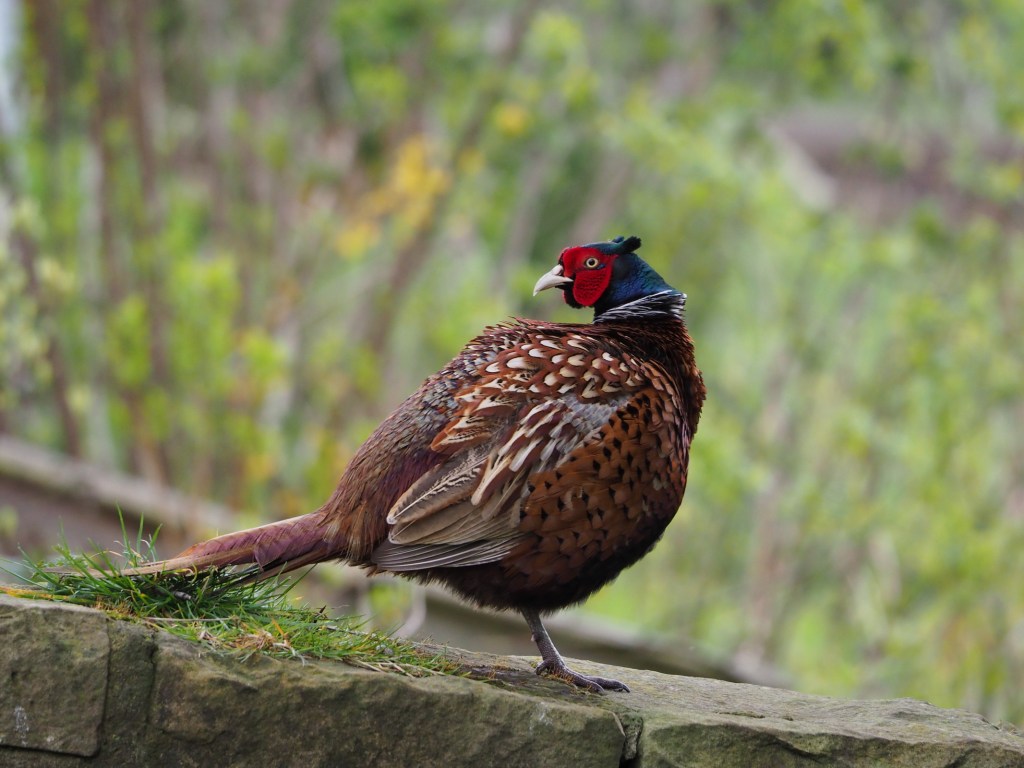
The Olympus version (right) is the clear winner here, with more accurate reds on the pheasant’s face. The ACDSee version would need further editing to match the Olympus colours.
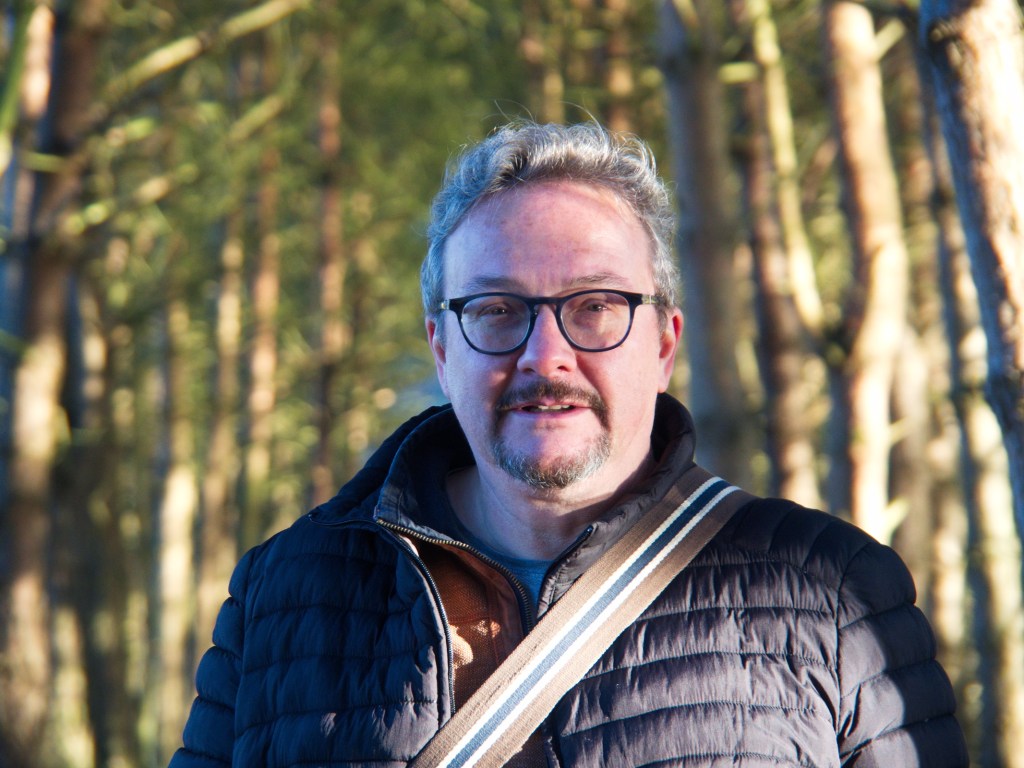
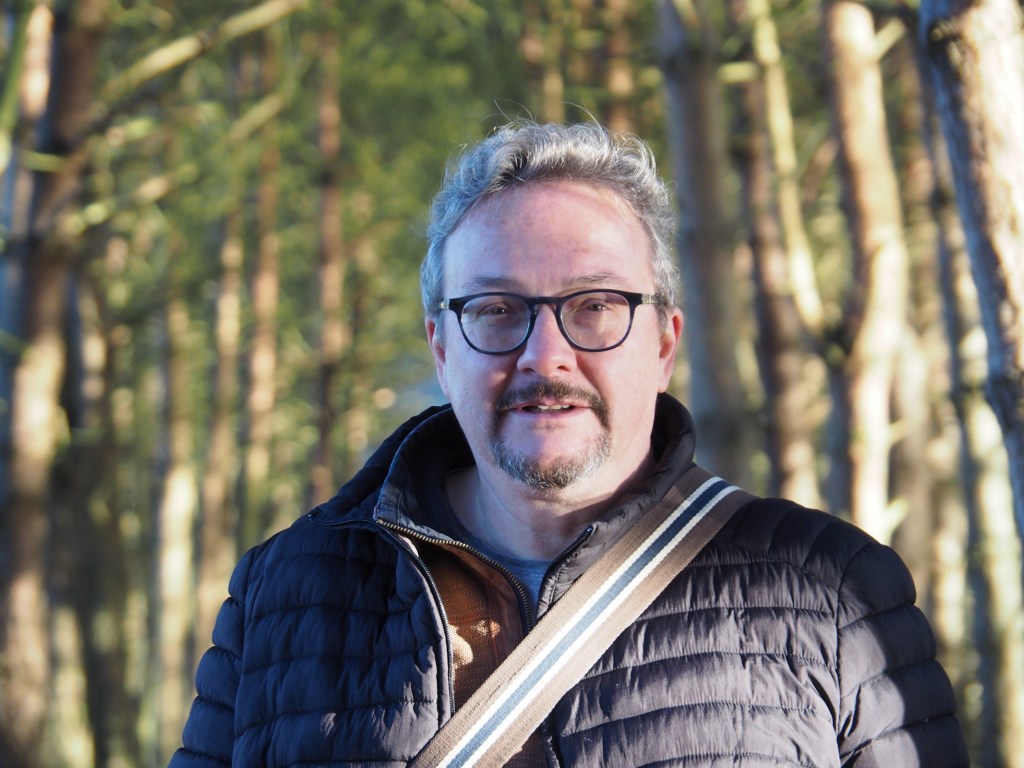
This time the ACDSee version (left) is the clear winner due to the increased clarity. Both versions need more work on the highlights to produce a more balanced image.
Where to download the preset
Download the preset here
How to install the preset
- Go into Develop mode
- Look for the Develop Presets pane
- At the bottom of the Develop Presets pane, look for three icons
- The middle icon shows an arrow pointing into an open box (it’s immediately to the right of the + icon)
- Click this middle icon and follow the instructions onscreen

Leave a comment